
How to Clean Lampshades Without Warping or Water Marks
August 16, 2026
A lampshade can look like one simple surface, but its shape may depend on fabric, paper, plastic film, glue, wire, stitching, trim, and a fitted liner working together. The outside material is only part of the cleaning decision. A method that suits a removable glass shade could buckle paper, loosen glued trim, set a ring in fabric, or cloud a plastic surface.
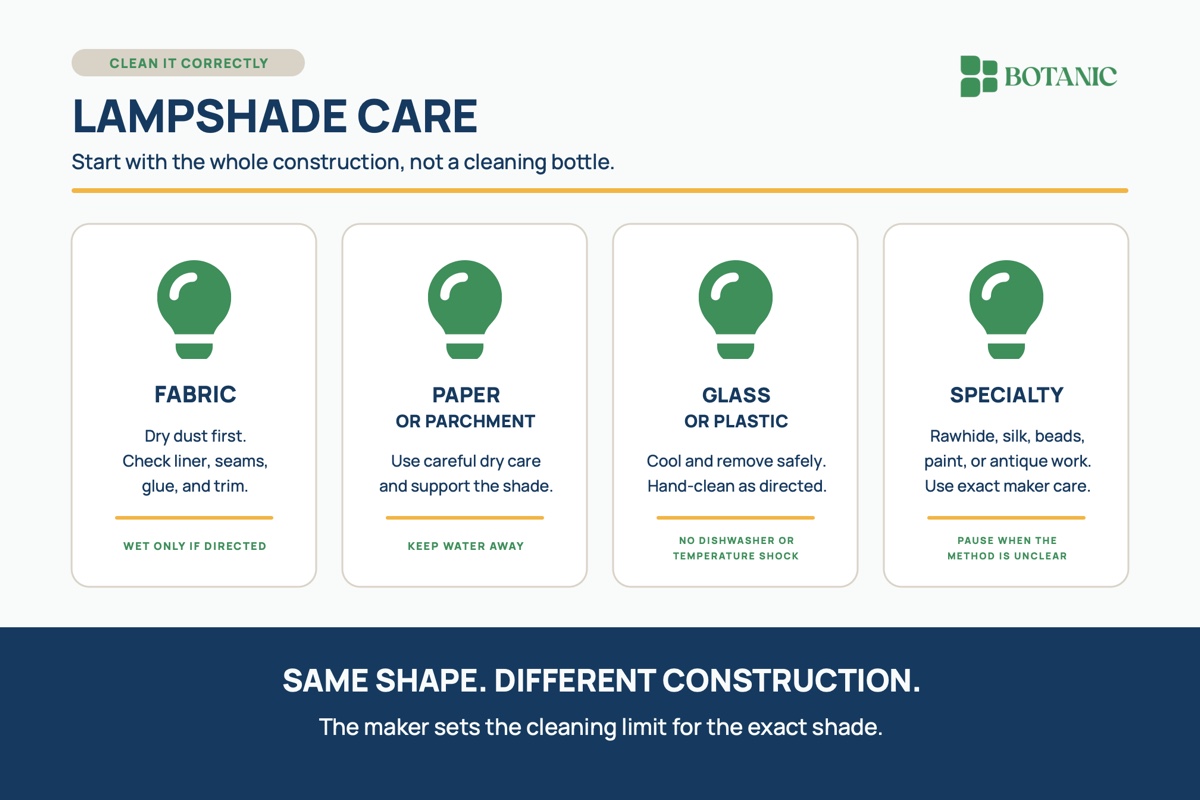
The calmest approach is to begin with construction, not with a cleaning solution. Find the maker’s care directions when they are available, remove loose dust before adding moisture, and choose the least intensive method that addresses the actual soil. If the shade is valuable, handmade, fragile, or undocumented, a qualified lamp or textile specialist may be the better next step.
Turn off the lamp and let every part cool
Switch the lamp off, unplug a portable lamp, and let the bulb and shade cool completely before handling them. For a hardwired fixture, follow its manufacturer’s instructions for safe access and power control. Do not reach around a hot bulb, clean a shade while the light is on, or apply moisture near a socket or electrical connection.
Remove the shade only when the lamp or fixture directions explain how to do so safely. Note the order of the finial, washer, harp, fitter, retaining ring, or other hardware so it can be returned correctly. Support the shade by its frame or fitter rather than squeezing the face material. If safe removal is unclear, leave it in place and limit care to the method the maker permits for an installed shade.
Identify more than the surface you can see
Look at the outside, inside, top edge, bottom edge, seams, and trim. A fabric shade may be a soft stitched shade or a hardback shade bonded to a plastic liner. Pleats may be sewn, folded, glued, or all three. Paper and parchment can resemble fabric from a distance. A rigid shade may be glass, acrylic, another plastic, coated metal, or a combination of materials.
Search for a label, product number, order record, or care page. Record decorative details such as braid, fringe, beads, embroidery, paint, printed pattern, rawhide, leather, metallic leaf, or glued ornament. Those details can set the cleaning limit even when the main material could tolerate more.
Remove loose dust before treating any mark
Dry soil removal is the safest useful first step for many shades. Work from top to bottom with the tool the maker permits. A clean, soft brush can lift dust from pleats and seams. A dry microfiber cloth may suit a smooth, sturdy surface. A vacuum upholstery tool at low suction may suit some durable fabric shades when the maker allows it, but keep the nozzle from pulling the fabric, trim, or liner.
Use a clean tool and light pressure. Support the shade so brushing does not distort the frame. Turn the shade as you work rather than reaching across it, and inspect the tool often for dye, flakes, fibers, or finish transfer. Stop if the surface snags, pills, sheds, dents, or changes sheen.
For fabric shades, moisture is permission-based
Do not assume every fabric lampshade is washable. Water can leave a tideline, shrink the face fabric, soften a paper or plastic liner, disturb sizing, release dye, rust the frame, or loosen adhesive and trim. If the maker specifies dry dusting only, stop there.
If the maker permits a damp or washable method, follow the exact directions for removal, detergent, water temperature, soaking, agitation, rinsing, and drying. Test the complete directed method in an inconspicuous area when the maker allows it, then let that test dry fully before judging the result. Clean an area evenly rather than saturating one isolated spot unless the directions specifically call for spot treatment.
Fenchel Shades’ current care guide allows a fuller hand-washing method for suitable cloth shades, but it also directs readers to follow any care tag and recognize that attached embellishments may not tolerate washing. That is a good reminder that a general fabric method does not override the construction of the shade in front of you.
Keep paper and parchment care dry unless directed otherwise
Paper and parchment shades can absorb moisture quickly and may stain, buckle, soften, or lose their shape. Handle them with clean, dry hands or clean gloves so skin oils do not become a second mark. Use a soft, dry brush or clean dry microfiber cloth only when the maker permits it, supporting the opposite side so the shade does not dent.
Do not use water, spray cleaner, steam, a damp sponge, adhesive remover, or an eraser unless the exact maker’s instructions authorize that method for that shade. A yellowed area may reflect age, light exposure, heat, coating change, or absorbed soil that ordinary cleaning cannot reverse. More rubbing can turn discoloration into surface loss.
Hand-clean removable glass or plastic only when permitted
Glass and plastic shades often tolerate more moisture than paper or fabric, but the exact finish and construction still matter. Painted, frosted, printed, etched, coated, mirrored, or decorated surfaces may have stricter directions than plain glass. Some plastics scratch or haze under abrasive tools and strong cleaners.
When the maker permits hand washing, let the shade cool, remove it safely, and use the directed lukewarm water, cleaner, cloth, and rinsing method. Fenchel Shades advises gentle hand washing for suitable plastic and glass shades and warns against the dishwasher because heat and detergent can damage them. Avoid sudden temperature changes, abrasive pads, hard scraping, and twisting pressure at a narrow fitter.
Dry the shade with the method the maker specifies, checking rims, grooves, fastener points, and decorative edges for trapped water. Do not reinstall it until it is fully dry and the lamp hardware is also clean, dry, cool, and undamaged.
Specialty materials need their own instructions
Rawhide, leather, silk, hand-painted paper, gathered textiles, feathers, beads, laminated natural fibers, and antique shades do not belong under one household recipe. A rawhide shade maker, for example, may specify its own conditioning product and application schedule. That direction applies to that maker’s rawhide construction, not to paper, leather, fabric, or another brand’s shade.
Pause when a shade has no care information and contains several materials, a valuable textile, unstable color, brittle paper, loose stitching, lifting trim, corrosion, a bent frame, or an unknown old finish. A lampshade maker, lamp repair shop, textile conservator, or other qualified specialist can help identify whether cleaning, repair, relining, or replacement is appropriate.
A five-step lampshade decision
- Cool and make access safe. Turn off and unplug a portable lamp, let it cool, and remove the shade only as the fixture instructions allow.
- Identify the whole construction. Check the face material, liner, seams, frame, fitter, finish, adhesive, trim, and maker’s care directions.
- Start dry. Use the gentlest permitted brush, cloth, or low-suction vacuum method to remove loose dust before treating a mark.
- Add moisture only with permission. Follow the exact maker’s method, test when directed, keep moisture controlled, and never improvise a universal wash.
- Dry and inspect before reassembly. Stop for rings, dye transfer, softening, buckling, loose glue, corrosion, cracking, or shape change, and reinstall only when every part is completely dry.
The useful rule is simple: a lampshade’s shape does not tell you its cleaning method. Read the construction first, remove what is loose, and let the maker decide how much moisture belongs in the next step. A shade that is still dusty can be cleaned another day. A shade that has warped, delaminated, or lost its finish is much harder to restore.
Choose the method by shade material
Fabric, paper, parchment, glass, plastic, metal, and laminated shades do not share one cleaning method. Start with the maker’s instructions, then remove loose dust with the least aggressive tool the material permits.
Keep moisture away from electrical parts, seams, adhesives, and materials that can warp or water-mark. If the shade cannot be identified, the fixture is hardwired, or the construction is fragile, stop at dry dust removal and seek more specific guidance.
A shade is clean enough when loose soil is removed without changing its shape, surface, color, or structure. More effort is not automatically better care.
With care,
Hazel